前言
简单梳理Pwn环境的搭建过程。
环境
- Ubuntu 16.04.7
- Python 3.5.2
- Python 2.7.12
常用软件
pwntools
一个ctf框架和漏洞利用python库。
1 | # python3 |
gdb
动态调试软件。
1 | sudo apt-get install gdb |
peda/gef/pwndbg
gdb的三个插件,配合gdb使用可以提升调试效率。
peda
1
git clone https://github.com/longld/peda.git ~/peda
gef
1
2wget -q -O- https://github.com/hugsy/gef/raw/master/scripts/gef.sh | sh
wget -q -O ~/gef/.gdbinit-gef.py https://github.com/hugsy/gef/raw/master/gef.pypwndbg
1
2
3git clone https://github.com/pwndbg/pwndbg ~/pwndbg
cd ~/pwndbg
./setup.sh
在同一时刻只能使用一种插件,而且在解决不同类型的题目时使用不同的插件,因此需要配置三种插件的快捷切换。
找到文件
.gdbinit,一般在根目录下,一般安装好pwndbg之后出现,内容为source ~/pwndbg/gdbinit.py,上述语句控制gdb使用的插件类型。加一个可以识别的字符串
#this place is controled by user's shell,不管是什么,需要注释并且不能与别的位置重复,并且需要把原来的source注释。1
2# source ~/pwndbg/gdbinit.py
# this place is controled by user's shell编写shell脚本:
1
2
3
4
5
6
7
8
9
10
11
12
13
14
15
16
17
18
19
20
21
22
23
24
25
26
27
28
29
30
31
32
33
34
35
36
37
38
39
40
41
42
43
44
45
46
47
48
49
50
51
52
53#!gdbstart.sh
#!/bin/bash
function Mode_change {
name=$1
gdbinitfile=~/.gdbinit #路径按实际情况修改
peda="source ~/peda/peda.py" #路径按实际情况修改
gef="source ~/.gef/.gdbinit-gef.py" #这个路径按照你的实际情况修改
pwndbg="source /pwndbg/gdbinit.py" #这个路径按照你的实际情况修改
sign=$(cat $gdbinitfile | grep -n "#this place is controled by user's shell")
#此处上面的查找内容要和文件'.gdbinit'保持一致
pattern=":#this place is controled by user's shell"
number=${sign%$pattern}
location=$[number+2]
parameter_add=${location}i
parameter_del=${location}d
message="TEST"
if [ $name -eq "1" ];then
sed -i "$parameter_del" $gdbinitfile
sed -i "$parameter_add $peda" $gdbinitfile
echo -e "Please enjoy the peda!\n"
elif [ $name -eq "2" ];then
sed -i "$parameter_del" $gdbinitfile
sed -i "$parameter_add $gef" $gdbinitfile
echo -e "Please enjoy the gef!\n"
else
sed -i "$parameter_del" $gdbinitfile
sed -i "$parameter_add $pwndbg" $gdbinitfile
echo -e "Please enjoy the pwndbg!\n"
fi
}
echo -e "Please choose one mode of GDB?\n1.peda 2.gef 3.pwndbg"
read -p "Input your choice:" num
if [ $num -eq "1" ];then
Mode_change $num
elif [ $num -eq "2" ];then
Mode_change $num
elif [ $num -eq "3" ];then
Mode_change $num
else
echo -e "Error!\nPleasse input right number!"
fi
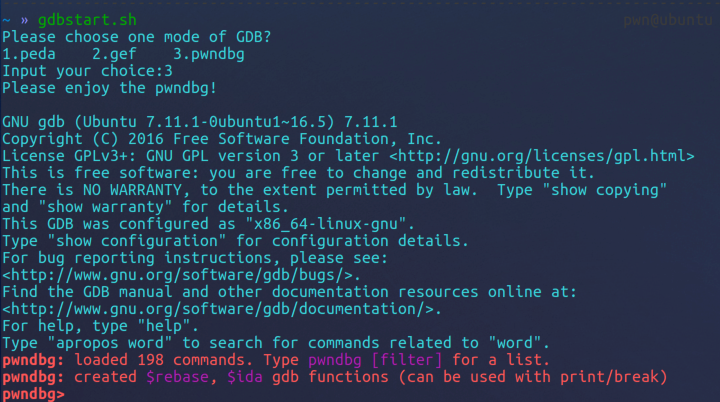
gdb $1 $2 $3 $4 $5 $6 $7 $8 $9把shell脚本放到一个环境变量指向的路径里面,随便一个位置即可。

检验效果如下。
32位程序支持
支持32位程序
1 | sudo apt-get install libc6-dev-i386 |
qemu
ARM的PWN环境。
1 | # 安装qemu |
LibcSearcher
泄露libc库中函数的偏移的库。
1 | sudo pip install capstone |
ROPgadget
用于寻找gadget。首先需要安装Capstone,一个轻量级的多平台架构支持的反汇编架构。
1 | sudo apt-get install python-capstone |
one_gatget
用于寻找寻找libc库中的execve(‘/bin/sh’, NULL, NULL)可以一个gadget就可以getshell的位置。
1 | sudo add-apt-repository ppa:brightbox/ruby-ng |
————————未完待续————————